How to create a Checklist in DAX
Hi , Its kinda simple to create a Checklist in X++ , just like the sysStartup Check List. Attaching the screenshot n objects used. In case anyone wants the XPO, lemme know. 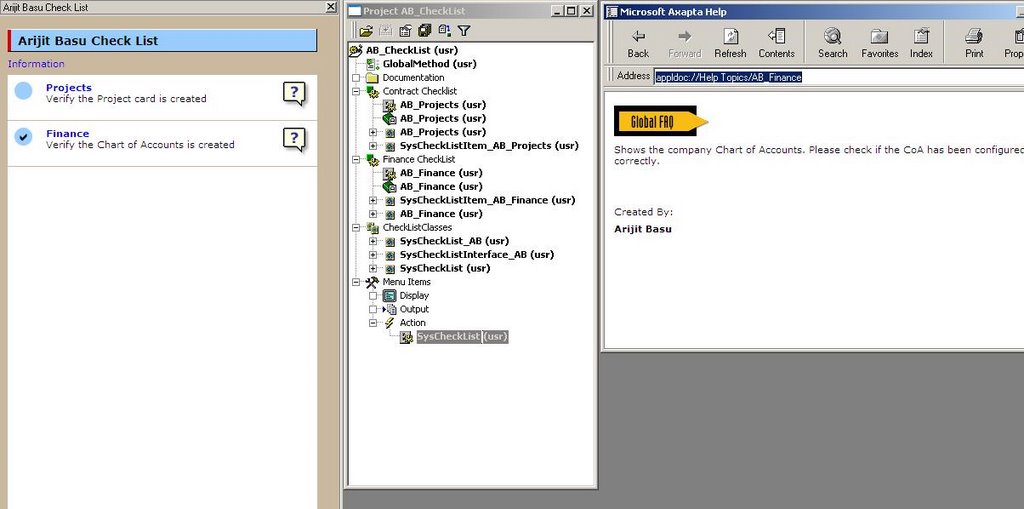
 |
Hi , Its kinda simple to create a Checklist in X++ , just like the sysStartup Check List. Attaching the screenshot n objects used. In case anyone wants the XPO, lemme know.
Recently i got an error when I installed DAX 3.0 SP5 on a fresh PC when it was compiling for the first time. The error screen is shown below. I downloaded the latest GridEX20.ocx from http://www.janusys.com/janus/beta/downloads_patches.htm
Replaced in the Client/Bin Folder . The error vanished :-)
An error log was generated in MyDocuments Folder :-(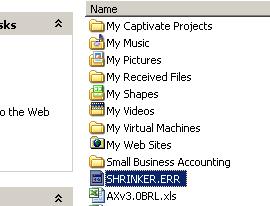
Replace the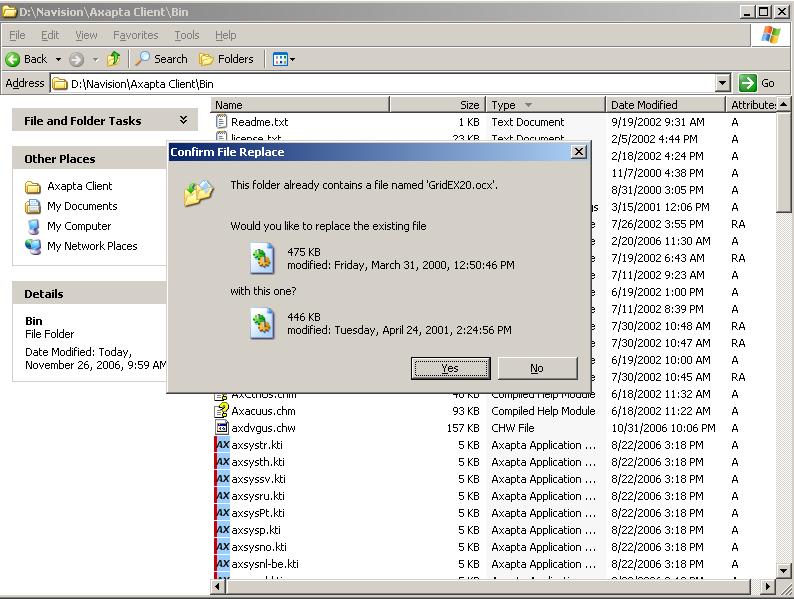 GridEX20.ocx and enjoy :-)
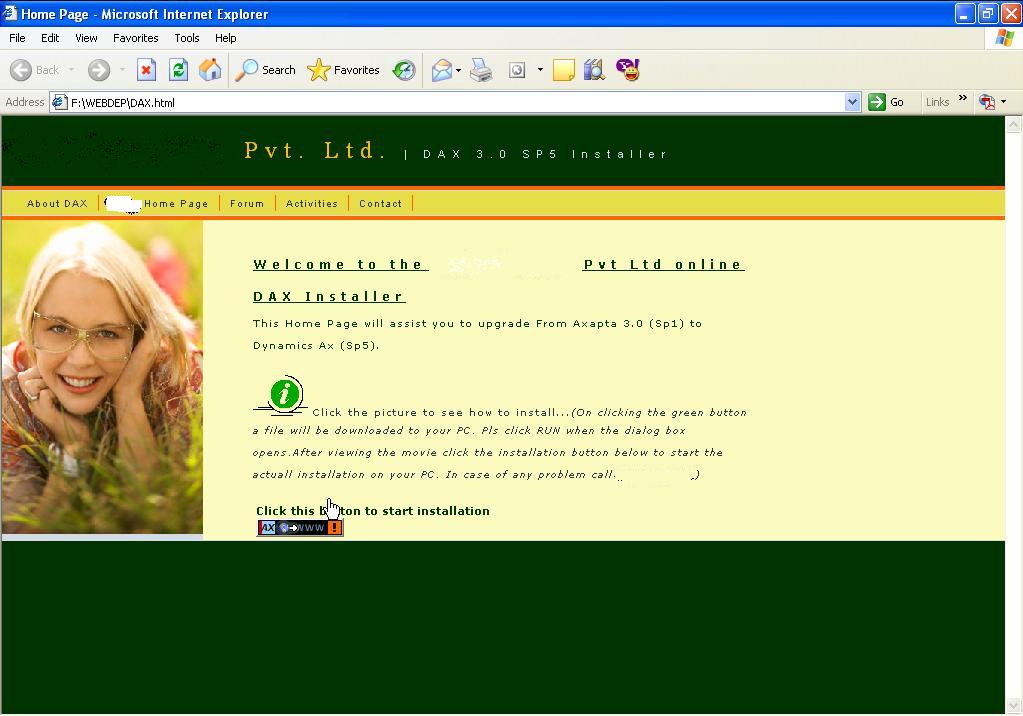
With Web Deployment, the user executes, deploys, and installs the Microsoft Axapta client using Microsoft IE. The user can easily see if they need to install or update the client or if the client is ready to run. Web Deployment also allows you to use a central configuration for all Microsoft Axapta users, making it easy for you to change parameters without going to each client workstation. The Flowchart for this process is attached below. Last month I did this for one of my clients and came up with a jazzy web page. For more details, you can mail me... 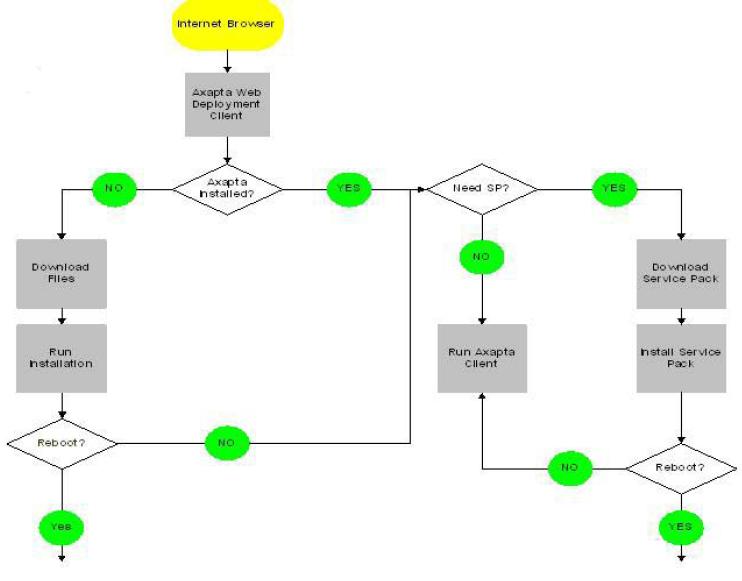
In Microsoft Axapta 3.0, there are three cache mechanisms:
1. the single record cache,
2. the entire table cache, and
3. the record view cache.
Record Caching
The record cache is utilized for full key lookups only and contains the 100 most recently used records for a particular table. In a 3-tier environment, there is a record cache on the client and a record cache on the server. The server record cache is shared between all clients.
Record Cache are of the following types:
(a) NotInTTS
(b) Found
(c) FoundAndEmpty
Entire Table Caching
The entire table cache is a different type of caching compared to record caching,which is a complete local copy of a table. The entire table cache exists on the AOS, a 3-tier rich client, the COM connector, and on a 2-tier client. This
means that there is no entire table cache on a 3-tier thin client, as it utilizes the entire table cache located on the AOS.
The cache is populated at the time of the first access to that particular table for a given company.
Record View Caching
The RecordViewCache is instantiated using a X++ select with a where clause that defines the result set. The RecordViewCache is deactivated as soon as the RecordViewCache object goes out of scope or is destroyed.
It is private and offers a result-set cache with a limited lifetime.
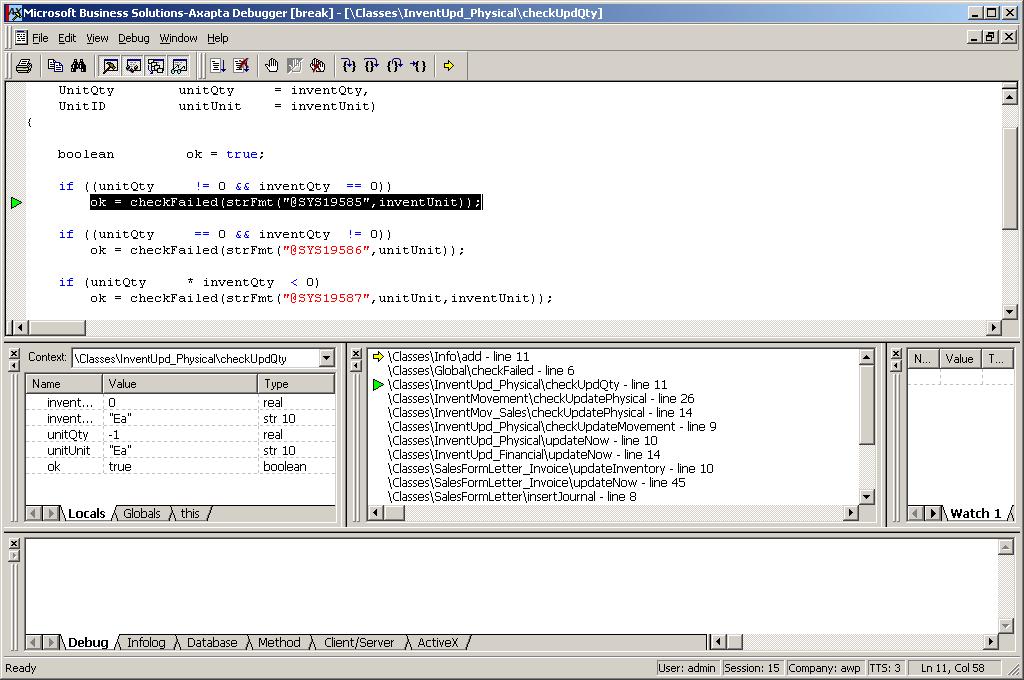
Wanna find out where the error message comes from? Heres the secret.... Place a breakpoint in the class \Classes\Info\add(). After that run the script that shows error. You can observe where the error comes from in the DAX Debugger :-). See the following screenshots.......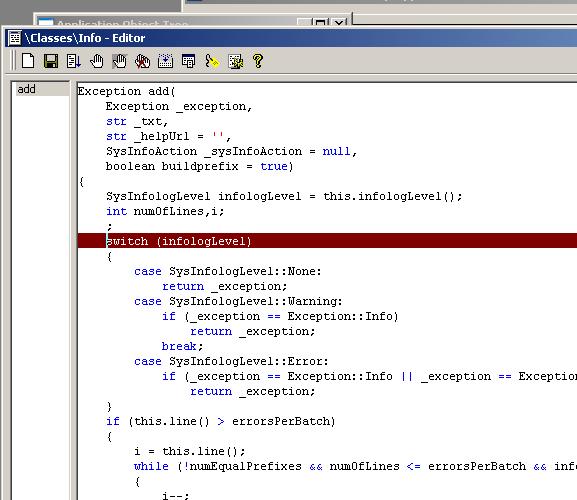

What is TAPI
TAPI (Telephony Application Programming Interface) is a Microsoft Windows standard interface for integration between telephone systems and windows based software. A typical example is integrating called ID with a database on your computer that contains detailed information about potential callers. When your phone rings, a window pops up
on your computer with information about the caller. This is possible through software applications that are TAPI compliant and support the Screen Pop and Auto-Dialer capabilities.
Prerequisites
To be able to use the TAPI interface, you have to install a TAPI CT adapter. The adapter have to support the telephone you are using, and in many cases it would be preferred to buy the adapter from the same producer as your phone.When the adapter is procured, follow the instructions and install the TAPI driver on your computer.
Setting up the TAPI interface
Setting up the TAPI interface involves the following steps:
• Set up Microsoft Windows to handle your TAPI driver
• Select and set up TAPI in Axapta CRM.
Setting up Microsoft windows for TAPI adapter
1. From the Windows start menu, select Settings/Control panel. Open the Phone and Modem Options.
2. When standing in the Dialing rules tab, press the Edit button.
3. Fill in the Edit Location form, press Apply, and click OK when finished.
4. Click on the Advanced tab, and then click Add. The new device will then appear in the Add provider window. Select the driver you have installed for your TAPI adapter,and click Add.
5. A new window will now appear, and you must select which com-port to use.
6. Close the Phone and Modem Options.
Setting up Axapta CRM for TAPI adapter
1. Start Axapta and select CRM.
2. From the main menu select Sales force automation/Setup/Telephony/Phone parameters.
3. Delete all lines in the Phone parameters window, and shut down Axapta.
4. Restart Axapta and select Sales force automation/Setup/Telephony/Phone parameters from the main menu.
5. In the Phone parameters window select the line device provider you are using, click on the Set active line device button, and restart Axapta.
6. When restarted select the Sales force automation/Setup/Employee option. Select employee and go to the Telephony tab and check the Activate answer checkbox.This will make the telephone dialog pop on your screen each time you receive a call.
If you need to update a sales order or a purchase order without any user dialogs, Axapta provides you with a simple interface to do just that.The SalesFormLetter and PurchFormLetter classes contain the update method, which gives you an easy interface to setup and run posting of a sales order or a purchase order.
static void postSalesFormLetter(Args _args)
{
SalesFormLetter salesFormLetter;
salesTable salesTable;
ttsBegin;
while select salesTable
where salesTable.DocumentStatus == DocumentStatus::Invoice &&
salesTable.SalesId == 'SO/07/123' // Select the SO Number
{
salesFormLetter = SalesFormLetter::construct(DocumentStatus::Invoice); // Get a new instance of SalesFormletter
salesFormLetter.transDate(SystemDateGet()); // Set the invoicedate
salesFormLetter.update(salesTable, // SalesTable
SalesUpdate::All, // Quantity to update (SpecQty)
AccountOrder::None, // AccountOrder
false, // Proforma only?
true); // Printout?
}
ttsCommit;
}
In order to create Global functions, create a new method in \Classes\Global Node. I have called mine Print Name.
{PLEASE BE CAREFUL}
\Classes\Global\PrintName
The Code in Print Name () is shown below
static str PrintName(Str FName,Str LName,Str MName="")
{
FName=StrDel(FName,2,STrLen(FName)-1);
If(MName)
MName=StrDel(MName,2,STrLen(MName)-1);
If(MName)
Return Fname+". "+Mname+". "+Lname;
else
Return Fname+". "+Lname;
}
And you've just created a global method :-)
Now Execute this job:
static void GlobalMethod(Args _args)
{
;
Info(PrintName("Arijit","Basu","Kumar"));
}
The Output: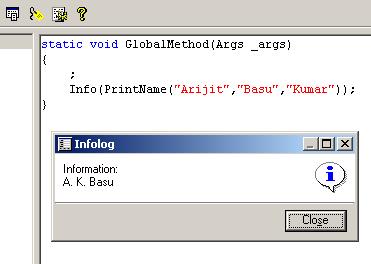
SysMailer mailer = new SysMailer();
SysEmailParameters parameters = SysEmailParameters::find();
mailer.fromAddress('arijitbasu@hotmail.com');
mailer.fromName('Pam@anderson.com');
mailer.subject('What are you doing tonite???');
if (parameters.DNSServerName)
{
mailer.DNSServers().add(parameters.DNSServerName,
parameters.DNSTCPIPRetryCount,
parameters.DNSUDPRetryCount);
}
if (parameters.SMTPRelayServerName)
{
mailer.SMTPRelayServers().add(parameters.SMTPRelayServerName,
parameters.SMTPPortNumber,
parameters.SMTPServerIPAddress,
parameters.SMTPUserName,
parameters.SMTPPassword);
}
// Add your own code here, then send the message
======================================================
SysMailer mailer = new SysMailer();
mailer.body("My Body :)");
mailer.subject("WOW Baby");
mailer.fromAddress("Pam@anderson.com");
mailer.fromName("Peter Villadsen");
mailer.tos().add("arijit.basu@gmail.com");
mailer.SMTPRelayServers().add("MyRelayServer");
mailer.sendMail();
======================================================
SysINetMail Mail=new SysINetMail() ;
Mail.sendMailAttach("Pam@anderson.com",
"jul@roberts.com,
"WOW",
"My Body Text ;-)",
false,
"Attachment Path");
All the Best :-)
Happy Mailin...
The particular number sequence can be found by:
1. Click General Ledger, click Setup, click Parameters and then look on the Number Sequence Tab. The Number Sequence you will be looking for will be the Number Sequence for Journal.
2. Right-click in the Number Sequence Code column and select the Main Table.
3. In the Number Sequence Window, click the List Button and delete any lines out of the window to correct the issue.
InventDim inventDim;
InventSum inventSum;
InventQty inventQty;
;
while select sum(postedQty), sum(received), sum(deducted), sum(registered),
sum(picked), sum(reservPhysical)
from InventSum group by itemId
join InventDim
where inventSum.inventDimId == inventDim.inventDimId &&
inventSum.itemId == 'A001' &&
inventDim.inventLocationId == 'GW'
{
inventQty = inventSum.PostedQty+inventSum.Received+inventSum.Deducted-
inventSum.Picked-inventSum.ReservPhysical;
}
info(strfmt('%1', inventQty));
static void createPurchase(Args _args)
{
AxPurchTable table;
AxPurchLine line;
;
table = new AxPurchTable();
table.OrderAccount('3023');
table.InventLocationId(‘WAREHOUSE’);
table.save();
line = new AxPurchLine();
line.axPurchTable(table);
line.itemId('A001'); // Item number Q987
line.purchQty(12); // 12 pcs.
line.save();
}
Highlighting complete rows
The method .displayOption() method on a form datasource can be over-ridden to control the appearance of an single row in a grid. It is possible to set the background or foreground (text) colour.
public void displayOption(Common _record, FormRowDisplayOption _options)
{
_options.backColor(WinApi::RGB2int(255,255,0)); // Yellow
}
Highlighting individual grid cells
To highlight one or more individual cells, use the ._options.affectedElementsByControl() method to limit the effect to only the cells in which you are interested.
Note that while this method can display the same colour in multiple cells, there is no way to display different colours in a single row.
public void displayOption(Common _record, FormRowDisplayOption _options)
{
_options.backColor(WinApi::RGB2int(255,255,0)); // Yellow
_options.affectedElementsByControl(Control_Name.id());
_options.affectedElementsByControl(Another_Control_Name.id());
}
static void Createquery(Args _args)
{
// This function will add a new Form to the AOT.
treeNode treeNode;
xInfo xInfo = new xInfo();
;
treeNode = xInfo.rootNode();
treeNode = treeNode::findNode("Forms");
treeNode.AOTadd("ArijitBasu");
treenode.AOTsave
}
void clicked()
{
Args args = new args(); ;
Args.parm(Parameter.text());
switch (Parameter.text())
{ case '10001' : new MenuFunction(MenuItemDisplayStr(ParameterClass), MenuItemType::Display).run(args); break; case '10002' : //call appropriate menu item here break;
}
super();
}
loginProperty loginProperty = new LoginProperty();
ODBCConnection odbcConnection;
Statement sql;
ResultSet result;
;
loginProperty.setDSN('dsnName');
loginProperty.setUsername('');
loginProperty.setPassword('');
odbcConnection = new ODBCConnection(loginProperty);
if (odbcConnection)
{
sql = odbcConnection.createStatement();
result = sql.executeQuery("select * from table");
while (result.next())
{
print result.getString(1);
}
}


 |


